 Painting stripes is a great way to add interest to an otherwise plain room. We aren't all lucky enough to have tons of great molding and the perfect windows & doors so we need to get creative to add the wow factor in a room. Our master bedroom lacks a lot in the character area and I think that a great thick stripe shade of iridescent grey on top of the already grey walls will really warm up as well as draw your eye up and around. I just picked up new grey & cream toile bedding at a tag sale & seeing the bed all done really made me fall in love with my bedroom again. Paint is always the biggest bang for your buck and these rooms are great examples of how gorgeous the right color & sheen combinations can be!
 This Blondie stripe with decorator's white gingham print is so elegant for this quest room.
 Black painted wood floors are great. This room speaks volumes with that bold addition. The chair adorned with numeral 5 is fab also!
 So bolder but then again so are the furnishings.
 I love the thick beachy blue stripes with creamy white. With the sandy wood colors it's really ends up being really cool and summery.
 This is a kids room from bhg.com. What a perfect way to hide imperfections and really get brave.
 Simple and subtle but turns this small bathroom into something pretty grand.
 Who says you have to spend 1800.00 on a striped dresser? A little painters tape will get you this little gem in just a few hours. I love it.
 Varying the size of the stripes makes this seem more like wallpaper then a paint treatment. I just love this bedroom.
Hope this inspires you to be bold or subtle and stripe something in your home. Does anyone have any ideas for a color combo that you like for a bedroom. let me know & Happy 4th everyone!


 A few months back I was browsing 1 of the 500


 Then I flipped the whole thing over and layed out the batting and traced around the seat leaving a few extra inches around the edges for stapling.
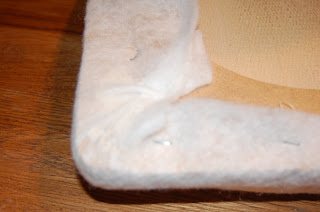 Staple the flat side first & then the sides leaving the corners for last. I made a small fold on each corner and stapled the hell out of it.


 I can't wait to carry them all upstairs and see them around the table.
